Author : Michael Meyers
Living my entire adult life in Chicago has given me an appreciation for how fortunate I am to have access to such an amazing city as a photographer. I see cities as a beautiful combination of two very different elements. There is a constant flow of movement – cars, people, machines, and in some cases natural movement like water and clouds. But all of this movement is set against a backdrop of immovable architecture – massive monuments of design streaking toward the sky in gleaming towers of steel and glass. This dichotomy presents a number of opportunities and challenges when it comes to photography.
HOW I APPROACH CITYSCAPE PHOTOGRAPHY
For me, cityscape photography is about trying to convey to the viewer the most notable parts of the scene or moment in an interesting and engaging way. Given how much a city is in constant motion, being able to highlight, or sometimes conceal that motion and create a compelling photograph oftentimes means being creative with your exposure time. And using ND filters and polarizers becomes an invaluable tool for a photographer seeking to tell their version of any given moment in the city.
WHY I USE NISI FILTERS
By using the NiSi V5 Pro Advanced Filter Kit, I’m able to do things that I would not normally be able to do with my camera. I can create more striking final images by employing a variety of techniques that allow me to stretch my shutter speed or balance light in a way that creates a noticeably different approach to a conventional shot. In short, they help me take the kind of photograph that separates itself from a traditional cityscape shot – and save me time in the editing process by being able to properly expose for all areas of the shot in camera.
My goal in the following paragraphs is not to prescribe the exact way to shoot a scene. My goal is to offer some ideas on how shooting certain elements of a scene in a particular way can create a desired effect, and how and what you need to create those effects.
SETTING UP FOR SUCCESS: VISUALIZE, PLAN AND PREPARE
Before taking a shot, I ask myself “what’s the most compelling story here? Do I want to highlight all the moving parts? Are those moving elements distracting me from the main story? How can I best highlight the part of the story I want to get across?”
I try to visualize how I want the final photograph to look, and then use my camera and filters as the tools to create that image in camera.
For this entry I’ll be employing four techniques that use NiSi filters to create a variety of visually compelling images that will stand out from traditional cityscape shots.
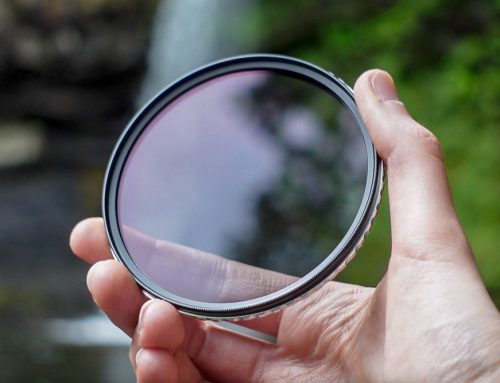
CREATING REFLECTIONS
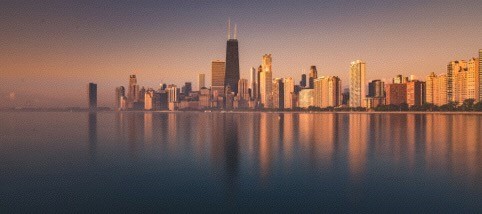
With NiSi 10-stop ND filter and Landscape CPL
30s, f13, ISO 100
This first image was taken during an exceptionally calm sunrise at North Avenue Beach in Chicago. The water was
uncharacteristically quiet that day, presenting an opportunity for me to highlight one of the best views of our impressive skyline with a reflection shot. I wanted to preserve a hint of detail in the water but keep it still enough to get a well-defined reflection.
For this I chose a 30-second exposure using the NiSi 10-stop ND filter to get the proper exposure time at f11 (ensuring the entire scene was in sharpest focus). The 10-stop filter lets me extend my shutter speed without letting in too much light and ruining the shot. I also used a polarizer to cut through any unwanted glare and hot spots the sun might cause from bouncing off a wave. The polarizer is great for cutting glare and unwanted reflections from any scene with a direct light source. I didn’t want anything distracting from the reflection of the skyline itself on the water. The result yielded a fairly well-defined reflection of the scene’s dominant component – the skyline.
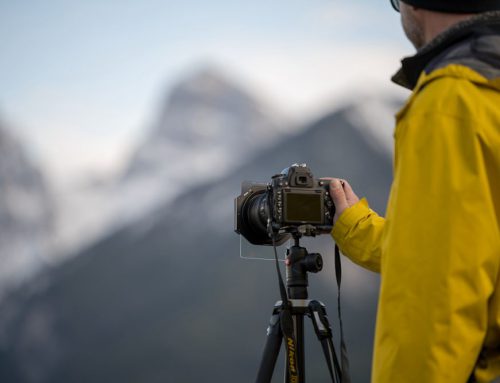
HIGHLIGHTING MOTION
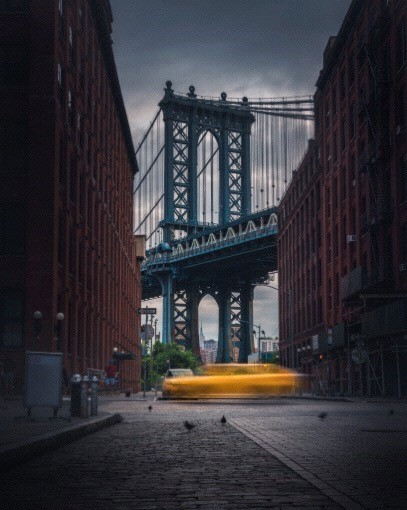
With NiSi 2-stop GND filter and Landscape CPL
1/3s, f13, ISO 100
This shot was taken from one of New York’s most iconic spots, looking down a weathered cobblestone street at one of the towers of the Manhattan Bridge. Since this shot has been done so many times from this spot, the challenge, as always, was to find some way to make it stand out. I pictured a shot of an iconic NYC yellow cab streaking across the scene to add an element of motion and action to contrast stoic buildings and bridge.
After some experimenting I found 1/3s to be the ideal shutter speed. To keep the image properly exposed at f11, I needed to lower the brightness of the sky. For that, I used the NiSi 2-stop graduated filter. This brought down the exposure of the sky to balance it with the exposure of the foreground of the shot, minimizing the amount of work I would have to do in the edit. I also wanted to bring out the rich red color of the bricks, which meant using the polarizer to keep any glare from reflecting off of their surface. The NiSi kit is designed so you can easily turn the polarizer filter without disturbing any other filters you may be using. So you can dial in exactly how strong of an effect you want from the polarizer no matter where you are in the shooting process. Personally, that feature may be my favorite part of using the NiSi system – it’s extremely convenient and useful. The resulting photo is a fresh take on an old classic, bringing focus to the streaking cab set against an iconic New York backdrop.
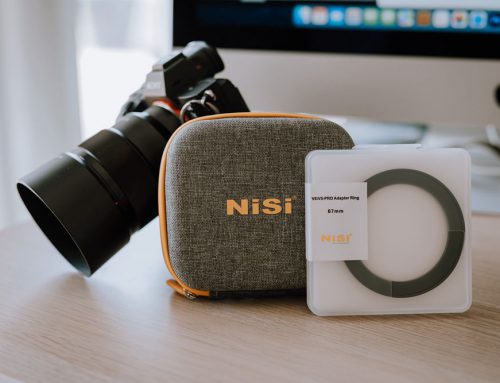
REMOVING DISTRACTING ELEMENTS
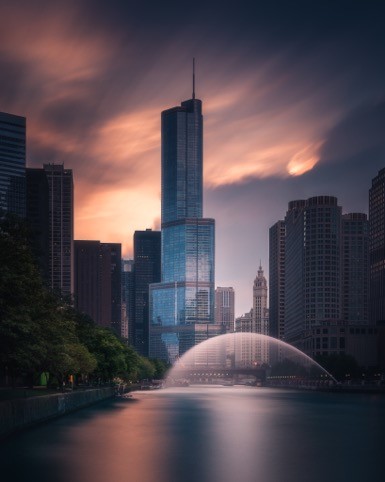
With NiSi 10-stop ND filter
277s, f11, ISO 100
One of the most helpful situations to use a NiSi ND filter in the city is to obscure moving elements that you don’t want to distract from your shot. This can be anything from tourists to cars to a bunch of pigeons determined to wreck your comp. Since none of these moving elements stay in one spot for any length of time during your exposure, they will not appear at all in your final shot. In this frame, the river was cluttered with five or six passing boats while I was taking this shot. But because the exposure time was so long, they are nowhere to be seen in the above image.
For this photo I wanted to do two things: use a long exposure to create an interesting texture with some fast-moving, colorful clouds, and eliminate the heavy boat traffic on the river to keep the scene clean and focused on the colors and textures surrounding the cityscape. I used a NiSi 10-stop ND filter to create a fairly long exposure time of over four minutes – long enough for all of the passing boats in the foreground to completely disappear in the final shot. The end result is a clean shot that juxtaposes part of Chicago’s iconic skyline against a colorful backdrop of smooth clouds and water.
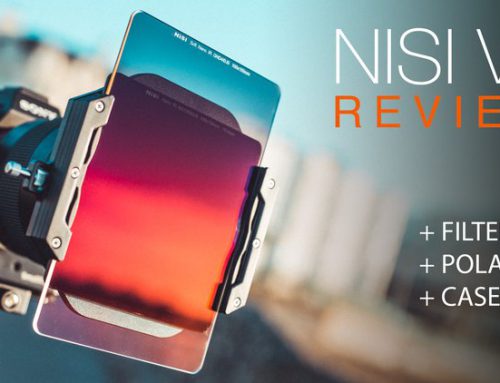
CREATING TEXTURE IN WATER
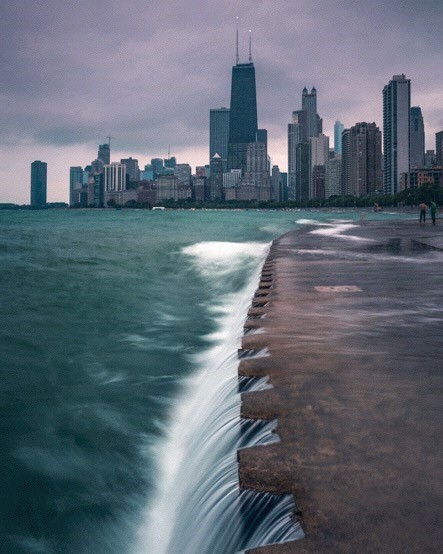
With NiSi 10-stop ND, 2-stop GND and Landscape CPL
1/3s, f11, ISO 50
Moving water can create some of the most amazing textures in photography. While extremely long exposures will eliminate motion and can give water reflective qualities as we saw above, a shorter shutter speed can retain flowing water’s texture while still creating a smooth, tactile quality. In order to achieve the desired effect, you’ll have to play around with your shutter speed until you get the result that you like most. There is no “correct” shutter speed – this is just personal preference. As long as you have exposed correctly for light and are properly focused, you’ll get a great shot.
For this photo, I really liked how the water looked at 1/3s. To properly expose the shot, I needed a NiSi 10-stop ND filter, and a 2-stop graduated filter to properly expose the sky, and a polarizer to cut the glare from the water on top of the concrete. The glare without the polarizer was definitely distracting from the rest of the shot. For situations like this, NEVER just take a single shot. Each wave creates a different photo, and you’ll want a bunch to choose from. I took about 40 shots in total before I caught a receding wave with a texture I really liked.
CONCLUSION
When shooting cityscape photographs, patience is key. If you want a result you’ll really be happy with, you have to envision the final shot, make sure your camera is set up to properly capture it with the correct settings and filters, and then be prepared to wait for the conditions to be right. Then you can capture the scene exactly as you see the image in your mind. It takes time, but I have never once regretted taking the extra time and preparation to get the shot right.